 Joy of Creation.

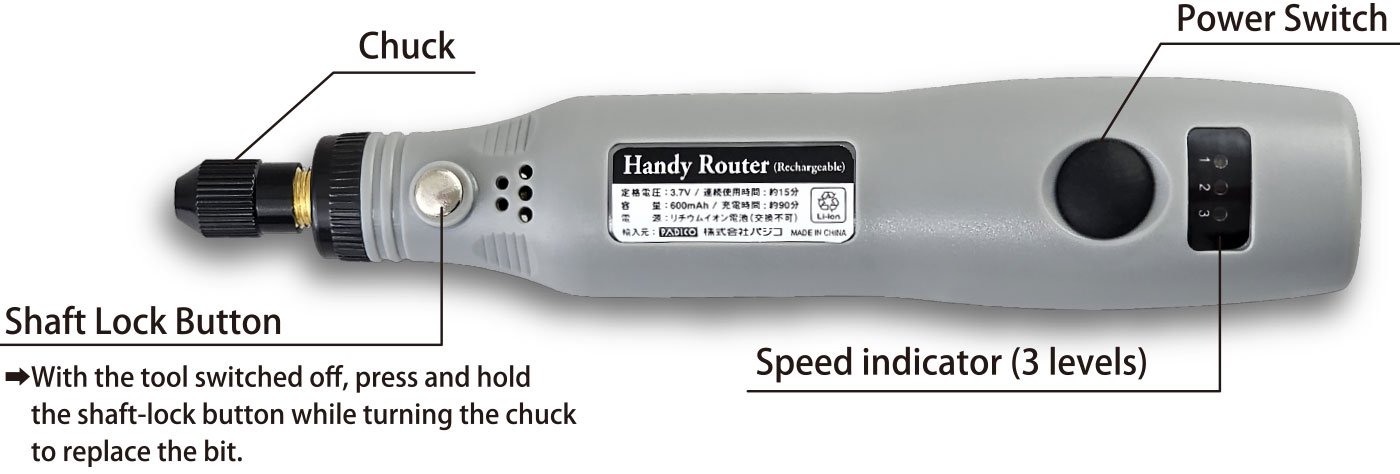
Rechargeable Handy Router
New , Resin Supplies , Resin Tools
#403440
JAN:4902498734404
Size:W148mm×H29mm×D29mm
Packaging size:W90mm×H188mm×D30mm
Gross Weight:approx. 161g(Main unit weight approx. 88g)
Unit color:Gray
Unit material:ABS
Voltage:3.7V
Capacity:600mAh
No-load Speed:Low: approx. 5,000 rpm
Medium: approx. 10,000 rpm
High: approx. 15,000 rpm
Continuous Operation Time:approx. 15 minutes
Charging Time:approx. 90 minutes
Caompatible Adapter:DC5V≒1A
Battery Type:Lithium-ion (non-replaceable)
Release:January 23rd, 2026
3,980 JPY
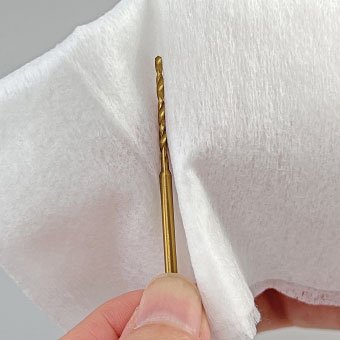
Drill, cut, carve, sand, and polish resin pieces, plastic, wood — and more!
Lightweight at about 88 g — comfortable to hold.
Swap the bits to carve plastics, wood, glass, and more.
Works great for many different materials.
Features
・Includes bits for drilling, cutting, sanding, polishing & engraving
・USB rechargeable & cordless
・3-speed rotation
・Lightweight: approx. 80g
・Standard Φ2.35mm shaft for quick and easy bit changes
・Requires a USB power adapter (DC 5V / approx. 1A), sold separately.
Handy Router
・Always wear protective gloves, a work apron, safety glasses, and a dust mask while operating.
・Be aware that dust and debris may scatter during operation.
・Work in a well-lit and well-ventilated area.
・Wash your hands after use to remove dust.

Dust Mask
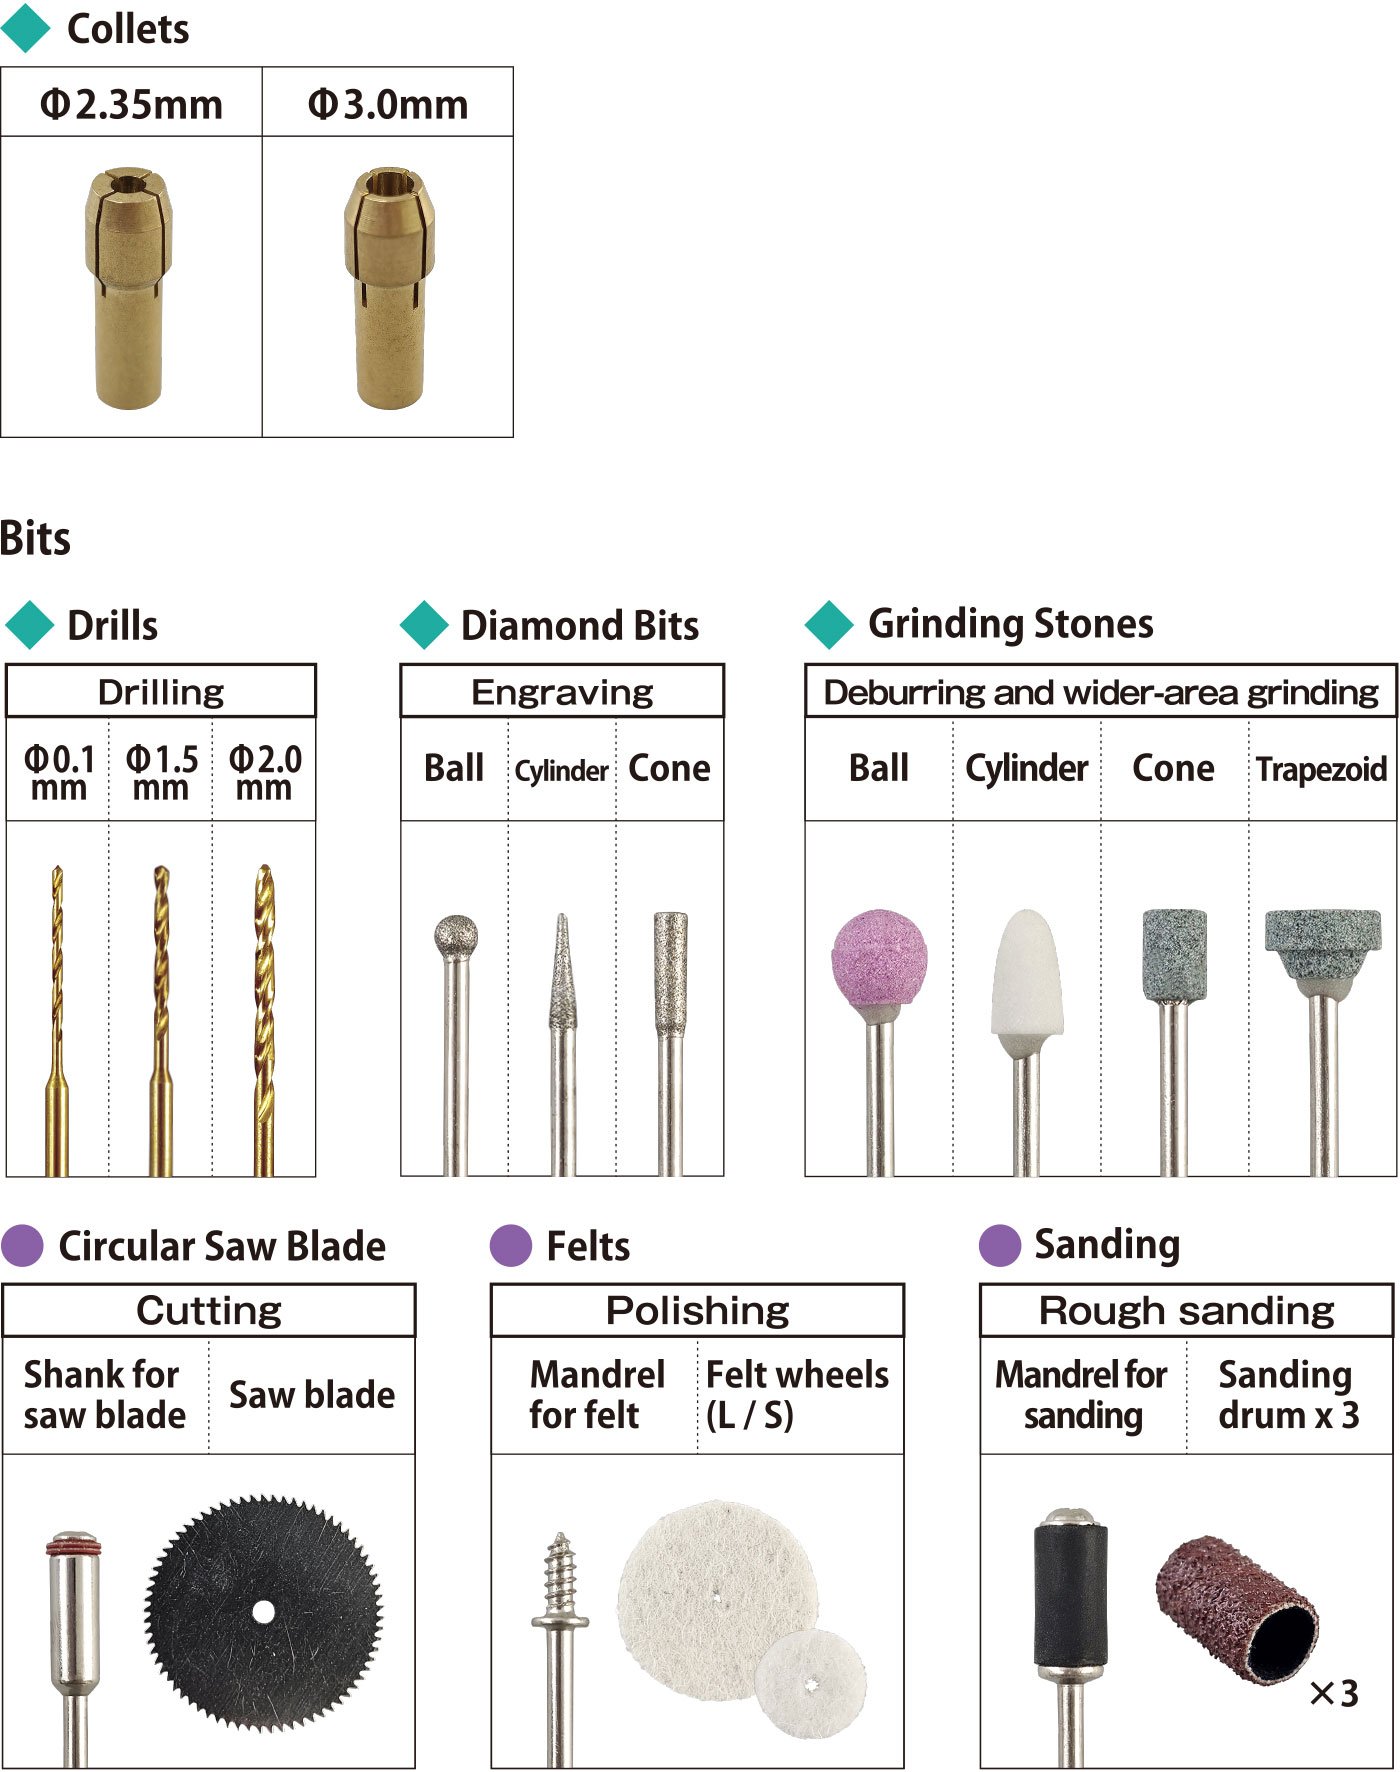
Contents
①Handy Router
②USB Cable (50cm)
③Collets for Φ2.35mm bits and Φ3.0mm bits
④Warranty: 6 months from the date of purchase (main unit only).
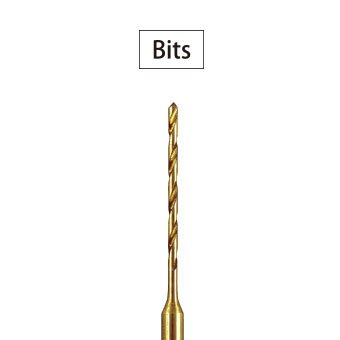
⑤Bits
- Drilling: Drill (Φ1.0mm/Φ1.5mm/2.0mm)
- Cutting: Circular saw blade /Shank for saw blade
- Rough Shaping: Sanding drum / Mandrel for sanding
- Sanding: Grinding stone bits (Ball / Cone / Cylinder / Tapered)
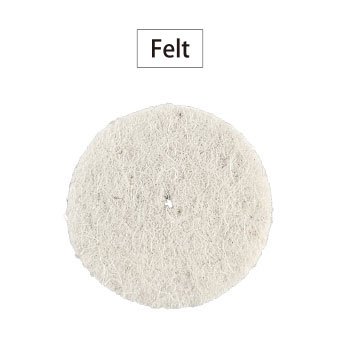
- Polishing: Felt wheels (Large / Small) / Mandrel for felt
- Engraving: Diamond bits( Ball / Cylinder / Cone)
Safety Warnings -Please Read Before Use-
・Always wear protective gloves, a work apron, safety glasses, and a dust mask while operating.
・Be aware that dust and debris may scatter during operation.
・Work in a well-lit and well-ventilated area.
・Hold both the workpiece and the router firmly during operation. Take care to prevent the workpiece from flying off or the bit from touching your hands due to recoil.
・Do not use this product on materials so hard that they cause the motor to stop, as this may result in damage or malfunction.
・Keep the product out of the reach of children and pets during both operation and storage.
・Do not carry, swing, throw, or drop the product while holding it.
Doing so may cause injury, accidents, damage, or even fire due to impact.
・Do not use the product in wet, humid environments or in the rain, as this may lead to malfunction or accidents.
・Do not disassemble, modify, or alter the product. Doing so may cause accidents.
・Store the product in a cool, dry place, away from high temperatures, humidity, and direct sunlight.
 Basic Usage
Preparation
●Attaching the Collet to the Main Unit
Included collets (2 sizes)
・All included bits can be secured with the ϕ2.35 mm collet.
■How to attach the collet to the main unit
- 1
Make sure the power is turned OFF.
- 2
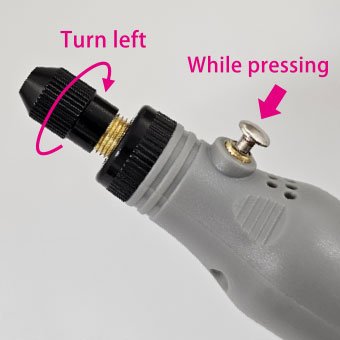
While gently pressing the shaft-lock button, turn the chuck in the loosening direction to loosen it.
- 3
Insert the bit all the way in.
- 4
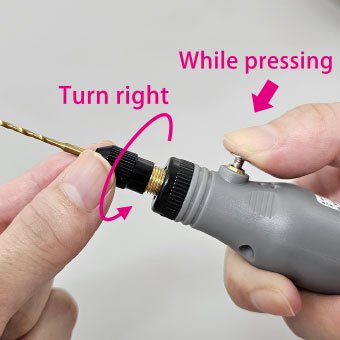
While pressing the shaft-lock button, turn the chuck in the tightening direction until the bit is firmly secured.
●How to set each bits into the collet
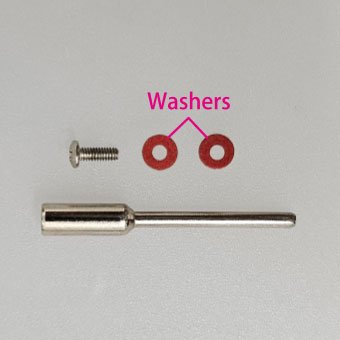
・Circular Saw (Cutting)
- 1
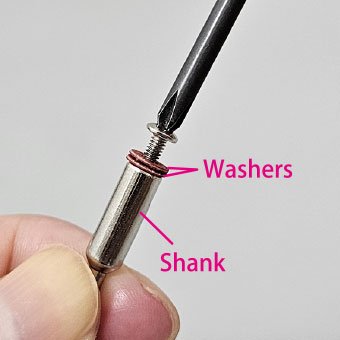
Remove the screw from the shank using a screwdriver.
- 2
The shank with the screw removed.
- 3

Place the circular saw blade between the two washers. Insert the screw through the washers and blade, attach it to the shank, and tighten securely.
- 4

When setting, make sure that — viewed from the screw head — the blade teeth face to the left.
・Sanding (Coarse sanding)
- 1
Insert the sanding sleeve firmly onto the black rubber mandrel.
- 2

Fully inserted.
Tip: If the sanding sleeve is difficult to remove, pinch the black rubber part with pliers and pull it out.
・Felt Wheels (Polishing)
- 1

Insert the polishing mandrel into the hole in the felt wheel.
- 2
Fully screwed in.
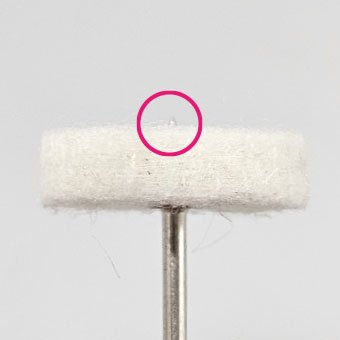
Note:
For functional reasons, the screw on the mandrel may stick out beyond the felt. When polishing, be careful of the screw tip and polish only with the side surface of the felt wheel. 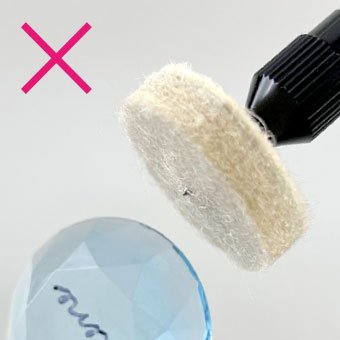
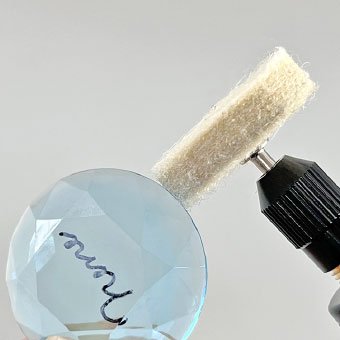
Correct orientation
(felt polishing)
How to Use
- 1
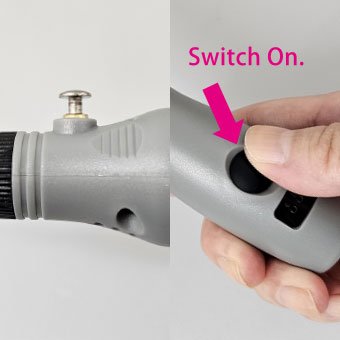
Make sure the shaft lock button is released, then turn on the power switch.
- 2

Hold the unit firmly and secure the object you are working on before use.
CAUTION
●When using drill bits, always place a 1–2 cm thick wooden board underneath the workpiece. 
Limit each use to within 15 minutes, then turn off the unit and allow it to cool down.
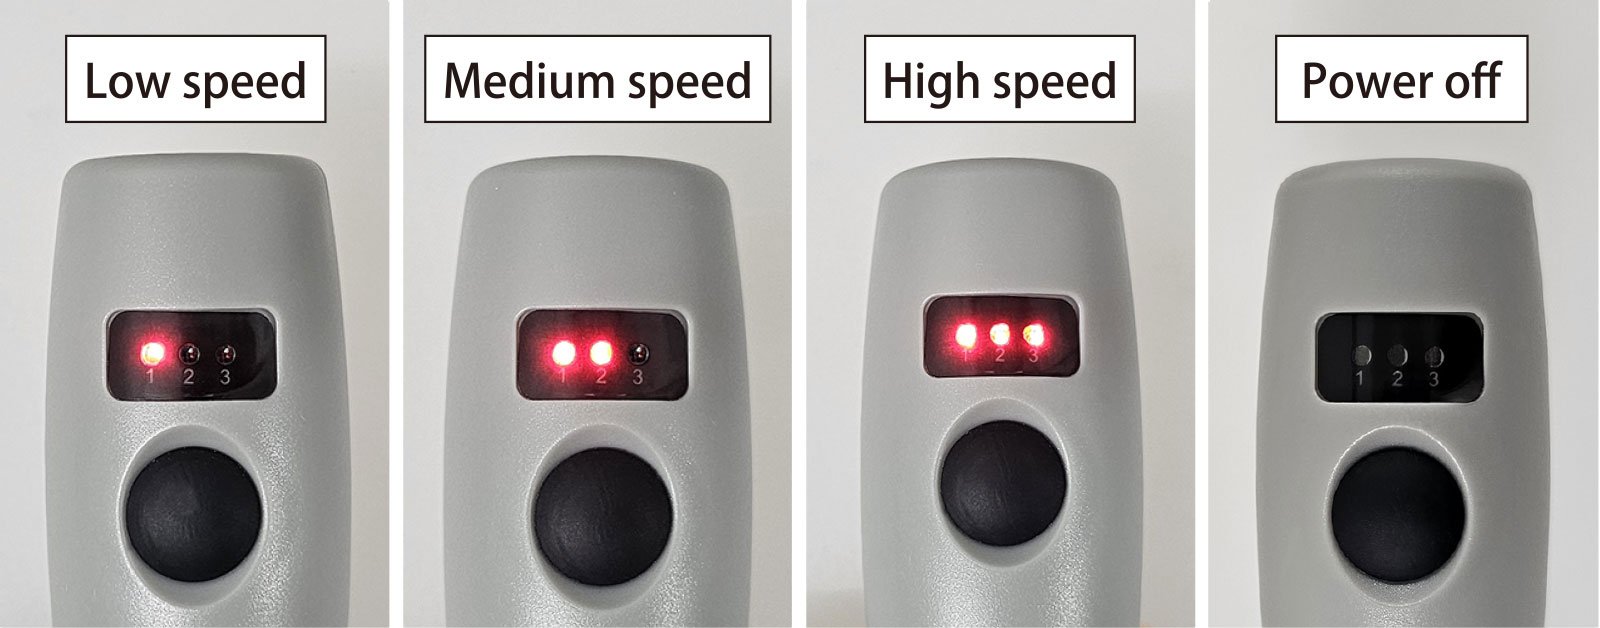
Each press of th switch cycles through the modes in the following order: Low speccd - Medium speed - High speed - Power off.
Never press the shaft-lock button while the tool is running. Doing so may cause damage.
Charging
- 1
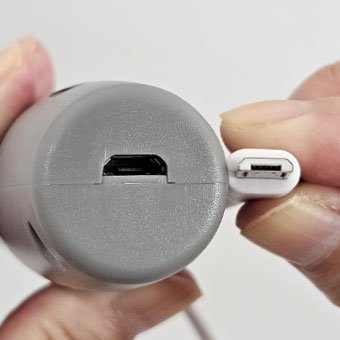
The cable has a fixed insertion direction. Please make sure the plug is oriented correctly.
- 2
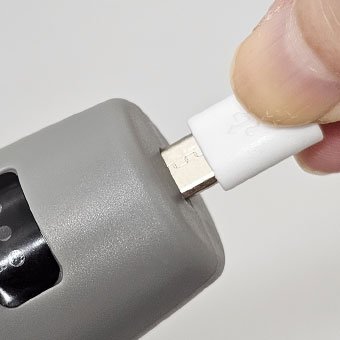
Insert the USB cable into the main unit.
- 3
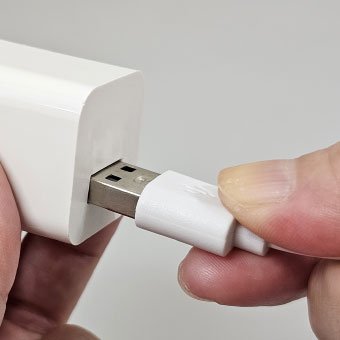
Connect the USB cable to a commercially available USB power adapter (DC5V ≒ 1A).
- 4

When charging starts, the indicator lights up red.
- 5

When charging is complete, the indicator turns green. Unplug the USB cable.
CAUTION
●Do not use the router while the cable is connected.
●For longer battery life, we recommend charging only when the remaining battery is low.
Cleaning & Maintenance
Wipe away dust and debris with a wet wipe or soft cloth, then let the unit dry completely.
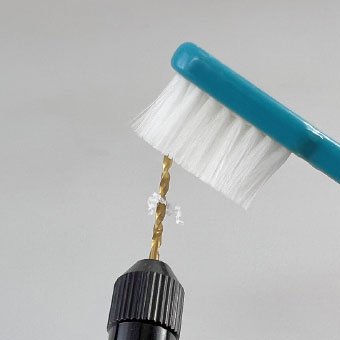
Remove residue stuck in grooves using an old toothbrush.
〜If debris is difficult to remove〜
Wash with mild detergent and a toothbrush, rinse with water, wipe off moisture, and dry thoroughly.
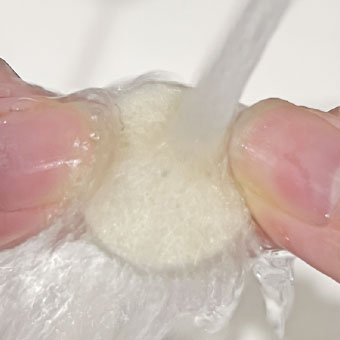
Dissolve a small amount of mild detergent in lukewarm water and gently press-wash. Rinse with clean water, press out the moisture with a cloth, and let it air-dry completely in a well-ventilated place.